Start right!
Safely mounting a totally green horse for the first time.
Defusing the anti-predator responses associated with mounting a horse.
by Jack Griffes
Certified Farrier - Colt Starting Trainer
(517) 7 Five Nine - 2 Nine 1 8
Lenawee County, Michigan
United States of America
Certified Farrier - Colt Starting Trainer
Lenawee County, Michigan
United States of America
Training horses always involves some risk of injury (or even death) to the horse, the trainer, any spectators, equipment used, etc. - this risk is totally your own as you will be making your own judgements on what to do. As with any suggestions on any subject you must weigh them out for yourself and proceed accordingly - at your own risk.
Many of the problems humans have with horses stem, in my opinion, from the fact that humans (even the vegetarians) see and react to the world through the eyes of a predator while horses see and react to the world through the eyes of a prey animal.
If you have ever watched predators (even your house cat) you will note they have their eyes on the front rather than the sides of their head and they tend to take a direct route toward where they are going - particularly so if they have locked onto some target. By contrast prey animals spend much of their time grazing or browsing perhaps with some destination in mind but with a lot less direct route involved getting there OR even if they take a direct route it often includes lots of starts and stops to sample tasty food items along the way. So what does that have to do with getting on your green horse safely the very first time? Well if you want to avoid having problems with horses you need to first realize you move like a predator - you home in on your target and take the most direct route between you and that target. So what? Well the horse, being a prey animal, reads your movement as "a predator is coming" and its first line of defense is to put distance between itself and any predatory threat.
Watch a house cat trying to catch a rabbit, bird, or squirrel and you will note that predators with a chosen target (if they start fairly far away) tend to close distance as rapidly as they think they can get away with until they get just outside of the prey animals "flee in panic" zone. At that point they slow way down - and try to disappear into the ground - closing the distance slowly. Then if/when they get close enough they suddenly burst into action to pounce on their prey.
Hmmm, that sorta sounds like the sequence followed when mounting a horse doesn't it? You close the distance between you and the horse fairly rapidly, once you get close you slow way down, then you suddenly spring upward onto their back.
Do you think maybe by doing that we might be triggering a very natural, instinctive, anti-predator response?
Now if you were a prey animal and you suddenly felt or saw a predator on your back what would you do? Probably anything you could to get it off - like "swallowing your head" and bucking.
From observation and decades of experience combined with a bit of early-on "learning the hard way" I have come to the conclusion that first time mounting has the potential to trip four different anti-predator "triggers." And while a prey animal rarely reacts to a single anti-predator trigger they do react to two or more anti-predator triggers that get pulled at the same time.
The four anti-predator triggers you have the potential to trip when first mounting a horse are: rapid upward motion close to prey; pouncing on back; squeezing pressure around barrel (picture a mountain lion trying to hang on); something higher than horse's head on back.
Generally speaking when people work slow and easy and basically smooze the horse into allowing first saddling - then mount up right away but also real easy - then they most generally get away with that first brief easy "smooze your way through it" ride. They walk around a bit, get off and call it a miracle. Then some other early ride - often the very next ride they let their confidence get the best of them and they push the youngling to trot. The youngster is unbalanced under all that weight on its back (picture yourself carrying a heavy backpack for the first time) and the rider gets slightly bounced out of the saddle and when they touch back down the horse translates it as a "pounce on back" with possibly the girth already giving the "hold on squeeze" and the rider being up above horses head on back --- 3 triggers pulled and it only takes two. This is a recipe for a rodeo event - saddle bronc. And it can be, in my opinion, completely avoided if you just "start right."
I do realize there are MANY ways to get a young horse started. I have seen people succeed in a variety of ways - and so have I. I know that some advocate intentionally allowing a young saddled horse to run free and bucking with just the saddle on to "get it out of them" because they can't get rid of that saddle. And I do know it can be done myriad ways. I just tend to believe that if my objective is to end up with a horse that NEVER bucks then maybe I should start it out in a way that doesn't involve the horse ever bucking with a human or even just a saddle on its back.
So can that really be done? Can you start out a completely green horse so that it NEVER bucks with a human on its back? Can a green horse on the very first day of training be taught so solid to "stand statue still when being mounted" that you can grab mane and swing up on it bareback from the near side, then swing off far side, and swing back up from far side - repetitively - with the horse standing perfectly calmly and statue still like this is "nothing new" - like it is an old hand - when actually nobody ever mounted it nor did any prep work toward mounting it until that very day - probably no more than 45 minutes to 1-1/2 hours earlier. -- To answer the question at the beginning of this paragraph - yes it can really be done - by "starting right."
How? By intentionally defusing each of the 4 anti-predator triggers. And yes you can and "optimally" you should do it all in one session. Don't underestimate the horses ability to learn - prey animals are precocious learners - they learn MUCH quicker and remember longer than predators (including humans) because their very lives can depend upon it. They aren't going to think like a human (predator) but they are the very best thing on earth at thinking like a horse (prey) - so your job is to teach that horse that even though you are a predator you aren't going to eat it - to teach it that when you hop on its back there is no reason to be afraid and thus there is absolutely no reason to try and get rid of you by bucking you off.
If you have a good high round pen you can do this with the horse at liberty - but I know that lots of people that want to start a horse under saddle don't have a good high round pen. So I am going to outline how to "Start Right" assuming you do not have a round pen but you do have a halter broke horse and a 30-35 foot rope. The rope can be put on in the form of a "come along" type rope halter or just clipped or tied to a well fitted halter. The rope is to allow you to keep the horse workably close even if you goof up as you learn to judge the difference between "glued to you" attentiveness and "that's too scary - I'm out of here" - which is key to making the first part of this work.
So with the 30-35 foot rope attached to your pupil's halter you step back away from it so that you are basically 25-30 feet away and directly facing its head (horse facing directly toward you - looking at you intently). If you have done well with your halter breaking earlier the horse likely will want to follow you everywhere so getting it to stay put while you move 25-30 feet away will be the first thing you have to accomplish. Sometimes stamping a foot is all it takes or stamping a foot as you take a large step toward it - both of which are "horse talk." Other times you may need to partially or fully raise hands over head. The idea is to do the least possible to get it to stay put while you put that 25-30 feet between you and the horse pupil by moving yourself 30 feet away. You don't want them to skitter away scared - that would indicate you over did it - you just want them to stop following you and stay put - ON YOUR COMMAND - with their attention glued on what you are doing. (And that correctly implies that they should also follow you even halterless - ON YOUR COMMAND.)
Once you have the horse standing about 25-30 feet away from you and facing you start lifting your hands up over your head - watching the horse INTENTLY while you do so. The rope should initially be held up off the ground a bit between you and the horse to help lessen odds of stepping over the rope or getting tangle-spooked - until you have got the horse standing "steady still" facing you - very intently watching your every move. At that point I favor keeping the rope in one hand but laying loose on the ground - not taut between me and horse - so as to eliminate movement transmission via the rope to the halter because of your hands moving up and down rapidly as they soon will be. You are starting to defuse the "rapid nearby upward motion" trigger. Putting your hands up over your head then straight back down by your head then rapidly over your head again is done to simulate you jumping up and down - without you wearing your legs out prematurely (because you are going to need them well rested later on.) If the horse is super skittish then move hands up and down slower. If the horse is NOT totally paying attention then (for that horse) you need to speed up how fast you move your hands up and down, see if that is enough, if the horse is still not riveted on you then move closer while you keep doing rapid up and down hand movement - beside your head to full upward arm extension - repeatedly. Now the key is get closer and closer all the time maintaining the correct demeanor in the horse pupil - namely - ears pricked forward, eyes GLUED on you - VERY intent but not leaving - keep it right on that edge of thinking about leaving but NOT even slightly starting to act on it. You keep moving forward as the horse relaxes - gathering up rope as you go - all the while doing the up - down hand motion to simulate jumping. If you goof up and the horse starts to leave then get it turned back around facing you, back off, start over - you keep trying and you will learn how to read the horse and keep that dynamic tension just right. Sooner than you can imagine you will literally be up with the horses nose on your chest or belly as you rapidly put your hands to full upward arm extension and back down by your face over and over and over and that horse just stands there like "this is just a normal everyday happening" - "nothing to fret over" - certainly nothing to be afraid of. Good job, good start.
Now you move over to the side of the horse about 20-30 foot back with you facing directly toward the horse's withers or just behind the withers. And you do the whole rapid full upward arm extension approach all over - with horse standing statue like as you approach from the side. Odds are you will be up by its side with your belly pressing against its barrel MUCH quicker than you got up to its head. And as you extend your hands to full arm extension with your belly pressed against the horses barrel you are now somewhat working on defusing a second trigger - the "something on back higher than head" trigger. Once you have this done thoroughly - meaning you can do super rapid upward arm extensions repetitively with your belly pressing against the horses barrel - then you go over to the other side and repeat it over there.
Now you have largely defused the "rapid nearby upward motion" trigger from the front and both sides - now do the same from directly behind the horse BUT do NOT approach within kicking range - stop outside kicking range - about one and a half horse lengths behind the horse and do NOT approach any closer.
If you read the horse well then the horse should not have moved at all as you did all this work defusing this trigger from front, sides, and rear. Seriously - the horse pupil should stand perfectly still the whole time.
Now walk up to the near side (left side) of your horse facing the riders groove (the area of the back where the rider naturally sits on a bareback horse). Set your hands gently atop the horses back - don't press down with your hands but just start raising up on your toes then back down and work up to jumping up and down with your hands just resting on the horses back. You are now completing the defusing of the "rapid nearby upward motion" trigger and simultaneously starting to defuse the "sudden pounce on back" trigger and again working on the "something on back higher than head" trigger. Your hands are transferring a bit of your jumping motion even though you are trying to "just rest them" on the back. Once the horse gets that "ho-hum, boring" look then start jumping higher and start pushing down with your hands eventually holding yourself up with your hands on horse's back, your arms full extended, elbows locked. Do the all the way up to elbows locked deal a few times on the near side - then go over on the off side (right side) and start over with hands on back and build up to the same all the way up to elbows locked several times. The horse should NOT move as you do this.
Now you are well on your way to having 3 out of 4 triggers defused. On to the fourth.
Stand on either near or off side - your choice - reach over horses back and squeeze its barrel a bit - repeat this over and over building up to really squeezing for all you are worth - like you are hanging on for dear life. The horse should NOT move as you do this. Move back and forth a bit squeezing different spots on the rib cage. You are working on defusing the "squeezing pressure around barrel" trigger. This is important because you will grab on with your legs - so it is important to thoroughly defuse this trigger. Now go over to the other side and repeat. Yes it is important to do each step from both sides.
Now you work on getting the horse ready for things that happen incidentally when it is being mounted - like getting bumped on the croup with a foot if rider goes off balance OR like a leg dragging over the back when a person mounts bareback from a laying across back position. You do this by simulating those actions with your arm and hand as you stand right tight against the horse by the riders groove. Reach back and move your arm up into the hip like you bumped it mounting bareback then sweep it across the back and croup like you are dragging your leg across - once it is going "ho-hum, boring" about this then you simulate dropping your foot on the croup trick that newbies do or that any of us can do if we get off balance when mounting. Bump a few times until the horse is giving you that "ho-hum, boring" look.
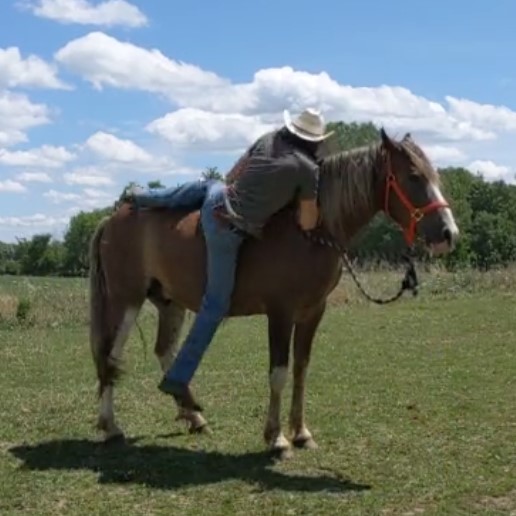
You are now ready to mount up. First time up you go right across the withers - belly down across withers with more weight on the side where your feet are just in case the horse moves (which it should NOT do.) Basically even when you have a horse to a point of high trust-ability you still play it safe and plan for the worst - it is still a horse - and if it gets spooked by something outside your area and moves you want to land feet first not head first, right? Okay you will very rapidly find it is very uncomfortable laying basically with the end of your ribcage hooked on the withers. But the horse is least likely to have issues with you getting on the withers first - so do it that way even though it is uncomfortable. Get down, repeat several times - then go over to the other side and repeat. The horse should stand still the whole time.
Now once you have down the belly down withers mount repeatedly from both near and off sides - go back to the near side and mount belly down on withers one more time, then slide back into the riders groove. This will be a LOT more comfortable for you. Now use your arm that is toward the tail and do the arm sweep across the area you would brush your leg if you were mounting from this position. Get off, then hop back up belly down on riders groove and do the arm brush again. Repeat this a half dozen to a dozen times on the near side then go start at beginning of this step and do the process on the off side. The horse should stand still the whole time.
Go back to near side, belly down mount onto riders groove, swing leg up (but not over) and now actually sweep your leg back and forth - it is heavier than your arm. Now keep your head down but swing your leg over the rest of the way to riding position with your legs just hanging loose - not gripping. Now sit up. You are now fully mounted on the horse. Hop off and repeat several times from near side. Now go over and do it all from the off side just the same way. Each time you mount up fully do it just a wee titch faster. You should be able to jump up belly down, instantly sweep leg over to other side and sit right up. Now dismount opposite side you mounted from - mount from that side - dismount from other side - do this a half dozen to a dozen times. Horse should stand still the whole time. (Spring 2025 - nearly 14 yrs after I first wrote this - yes you can use a bale of straw or something to stand on to make it so you can get up on the horse belly down - just get the horse used to standing very close to the bale and also get used to the bale rocking a bit when you jump up - then after mounting several times from the side you put the bale on first move the bale over to the other side and get the horse used to that and mount from that other side a number of times. See the video of Oakley.)
Okay now (if you are physically able) you test to be sure you FULLY defused all four triggers by tripping all four in rapid succession. You do this by grabbing mane and swinging up "Indian style" onto your bareback horse pupil. Horse should stand still for this like it has been mounted this way hundreds of times even the very first time you do it - no kidding. Dismount opposite side and grab mane and swing up from that side right away. Do a half dozen to a dozen of these grab mane and swing up mounts, dismount opposite side, swing back up right away. Horse should stand still the whole time. (addendum - Spring 2025 - nearly 14 yrs after I first wrote this I no longer have enough spring in my legs to grab mane and swing up "Indian style" on most of the young horses I start - and so I just do what I can - I get on them belly down and get my leg swung over and sit up straight as quickly as I can. In other words I maintain the principles of defusing all four anti-predator triggers and I adapt other aspects so I can get the job done and done thoroughly - with the horse standing like a statue while I get on and off it a number of times the very first time anyone has ever been on its back.)
End the session with plenty of praise given your horse pupil.
Next session - whether the next day or two later or whenever. Repeat this session - start up closer - move up quicker - you should be on the horse within 5 minutes in the second session IF you did the first session thoroughly. And yes the horse should stand still the whole time. That second session is just a "drive the point home" session along with applying wisdom in assessing that the pupil retained what it learned the previous session. If somebody else has done the prep work then not actually mounted the horse I test the thoroughness of their prep work via doing this whole session starting closer (sometimes starting with belly against horse face or barrel) and doing the whole thing MUCH quicker - as a safety assessment practice. If the horse passes muster then I proceed from where they left off. --- Not a bad idea to "drive the point home" two or three sessions after your initial mounting session.
I also suggest doing the first several days to two weeks worth of training bareback. This will encourage you to work slow and easy rather than rush your horse pupil. Remember that it has to get used to lugging you around - so work it at a "walk and trot only" for a while while you teach it to turn, stop, back, etc.. All that kindergarten stuff can be done bareback. And introducing the saddle is another topic - for another time. (Addendum - Spring 2025 - in some of the videos below you can see introduction of the saddle and next steps in the colt starting training process - with the objective of the horse NEVER bucking with you or your tack on its back. They all know how to buck - bucking is an anti-predator reaction - so your objective is to never push the horse into thinking you are a predatory threat. Rather you are striving to be a trustworthy herd leader.)
Certified Farrier - Colt Starting Trainer
My suggestion is to first read the article one or more times and then watch one or more of the demonstration videos. I suspect that will help you understand best. But I know a good many will watch one or more of the videos first - just remember the article combined with the video will, in my opinion, help you understand best.
Joel, my youngest son, going through the Start Right!! process with 9yr old Hank the Missouri Fox Trotter. He had been mounted years back but we did NOT know if he was started right. See the entire session - raw, uncut, unedited start to finish.
Witness me going through the Start Right!! process with 3yr old Cinnamon the Gypsy-Shire cross.
Cinnamon had never had anyone on her back before.
50 minutes and 41 seconds after the video starts I sit up on her bareback the first time.
And yes EVERY time I got on her bareback and sat up she stood like a statue on a loose rein.
See the entire session - raw, uncut, unedited start to finish.
You can see for yourself she is NOT stressed out - she has calmly reasoned out what I want her to do and she is willingly doing it.
Cinnamon arrived Thursday evening. Friday I used my Start Right!! process to prepare her and mount her bareback from both sides a number of times - in about an hour start to finish. Saturday in under five minutes from right up close and really fast I did a Start Right!! review and then mounted her from both sides bareback. Monday with no review I mounted her bareback from the near side only. I had planned to ride her bareback a few days before saddling her but she was too "dead sided" - too unresponsive - did not want to move. So knowing that I might possibly have to get after her quite a bit to get her to move I knew that might result in explosive motion when she finally did move - so I opted to saddle up, just in case. I apologize that I didn't get the first two times the saddle was put on her on film. But you get to see how I get her used to being saddled via the Rancher Toss Up method - which uses your body momentum to get the stirrup to clear the horse and then ease it down on the horse. You then get to see how uneventful the first saddle mount is on a horse that is started using my Start Right!! training process. And you get to see how I work to get Cinnamon to begin to recognize that leg pressure means to move and do circles. You also get to see how to do a tighter still gentle circle to get the horse to begin to learn to stop when requested. Everything at a walk this first time moving under saddle or bareback. Just working to get them acclimated to all this new stuff without giving them reason to be stressed out.
Do NOT rush anything - be calm - ooze calm from your every pore while working with horses. But do learn to feel and observe with increasing accuracy. At approximately 4min34sec in to this video my Start Right!! process begins - intentionally defusing the 4 anti-predator triggers associated with mounting a horse. At 17min43sec (13min9sec later) I am fully sitting up on Nutmeg, the 3yr old Gypsy Vanner, for the very first time she has ever had a person sitting on her back and she is standing like a statue. Nutmeg was simply not as worried as most young horses are - so I could start closer - and did not have to work her through a bunch of worry to a point of calmness - thus it took 20-40 minutes less than normal to be sitting up on her back the first time she ever had a person on her back - with her standing calmly like a statue.
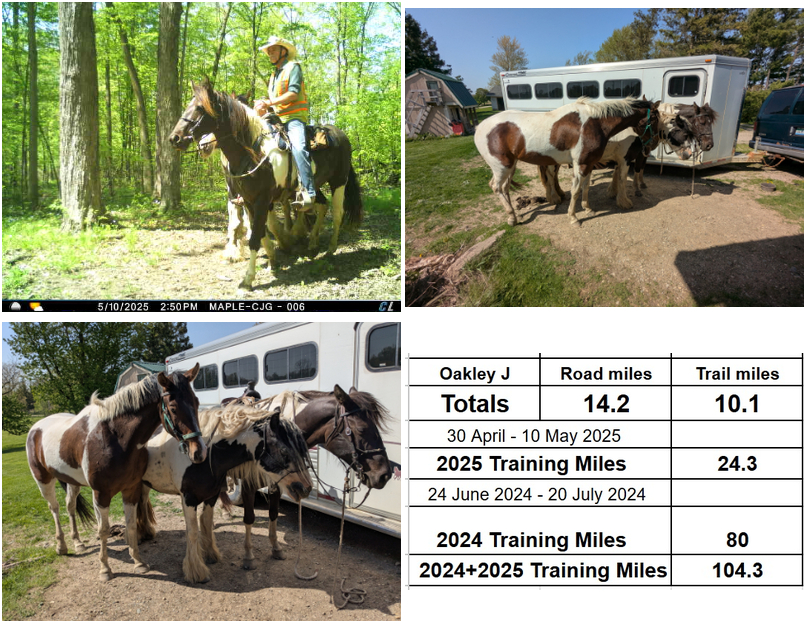
So what if you just cannot jump up high enough to mount the horse bareback? Well you defuse the four anti-predator triggers and you work something like having the horse stand next to a bale of straw into the process. The "method" is NOT important. The "principles" are important. The KEY is to defuse the four anti-predator triggers - just make certain you do that thoroughly. You can make other adaptions - such as mounting from a bale of straw if you cannot jump high enough to get on the horse from the ground. So in this video you can watch me make the straw bale adaptation (literally the first time I have ever done it with a straw bale) - so I can get up on this tall 3yr old Paint named Oakley - while he stands like a statue the very first time anyone has ever been on his back.
Oakley's second session was done later on the same day - objective is to calmly move the very first time he has carried a person on his back. And remember I just spent an hour telling Oakley to stand like a statue in one place - so he is pretty convinced that standing still is what he is expected to do with a person on his back - he has to reason it out that something new is being asked of him - now the rider also wants him to move when asked to move. So be patient - empathize with the young horse that is trying to do what you want but just is not sure what you want. And work hard on catching them doing right and letting them know you appreciate them trying to do right.
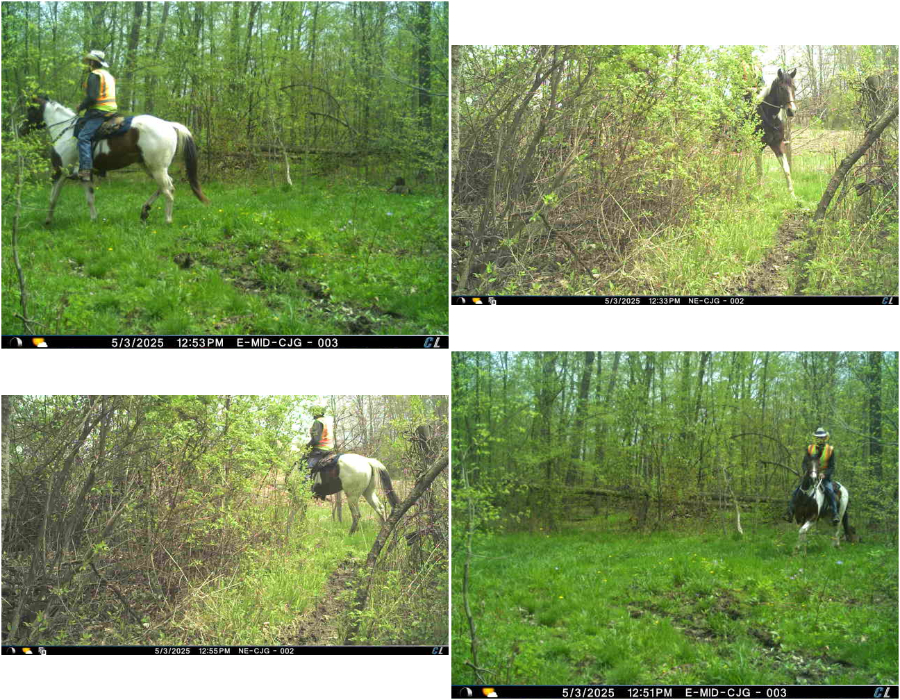
Oakley's second ride ever - his first ride under saddle. After arena work I took Oakley out for his first ever short solo trail ride - yes on the very first day he was ridden under saddle. Oakley had been ponied and line driven for one month the previous Summer as a 2yr old. Oakley logged 24.7 road miles and 55.3 trail miles for a total of 80 miles outside the arena during that month. So he already had brakes and steering as well as both road and trail experience. --- I decide when the horse is ready to be ridden outside the arena by when it has good "manual steering" and good "manual brakes" - I do NOT wait until they have "power steering" and "power brakes" - to use a car analogy. -- In addition to solid foundational training it takes REAL miles actually going somewhere to make a good horse. So I get started on both right away when starting a young horse.
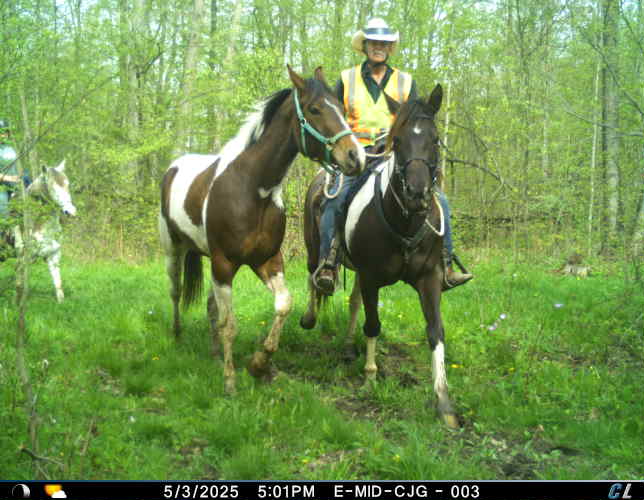
Later that same day I put on a horsemanship session for the owner of Nutmeg and a 14yr old girl who is training her first horse herself - after arena work with them I caught up Oakley and ponied him off Avi on our trail ride. In addition to solid foundational training it takes REAL miles actually going somewhere to make a good horse.
Oakley's third ride ever - second ride under saddle. After arena work we went on a short solo trail ride. In addition to solid foundational training it takes REAL miles actually going somewhere to make a good horse.
It rained a good bit so the next day the clay sod in our small lot we use as an arena was way too slick for working on a just started horse - so I saddled up my mare, Avi, and ponied Oakley down the road - including through the nearby Village - to give him experience with new sights, new sounds, and new smells - to simultaneously help build his personal courage and also to increase his trust in his master. In addition to solid foundational training it takes REAL miles actually going somewhere to make a good horse.
Our clay sod small lot we use as an arena was still too slick the following day. So Oakley was saddled up for a no warm up solo trail ride for his fourth ride ever - third ride under saddle. In addition to solid foundational training it takes REAL miles actually going somewhere to make a good horse.

Oakley's fifth ride ever - fourth ride under saddle. After arena work we went on a trail ride. In addition to solid foundational training it takes REAL miles actually going somewhere to make a good horse.
Oakley's sixth ride ever - fifth ride under saddle. After arena work we went on a trail ride. In addition to solid foundational training it takes REAL miles actually going somewhere to make a good horse.
The next day was Saturday 10 May 2025 and candidly I was feeling a bit exhausted due to a cold. I decided the best use of my remaining energy would be to saddle up my helper horse, my 10yr old mare, Avi, and pony both the trainee horses off of her simultaneously. I had originally thought to pony Oakley right next to Avi and Nutmeg on the outside but Nutmeg stuck like glue to Avi's side (she does not much care for Oakley) so Oakley was taught to go on the outside of Nutmeg. The first part we travelled 1.3 miles across the section we live on (not straight across the one mile square section but following trails and edges of fields and a lane) and then we went 2.3 miles on roads. We gifted a neighbor a dozen eggs. We stopped and talked to another neighbor for probably 15 minutes - having horses stand still while you talk to neighbors helps them build patience and gives a very natural way to stretch out their understanding that "whoa" means "stop right now and grow roots until given further direction." --- I was feeling too whipped due to sickness to do a good job riding young horses just being started but thanks to my helper horse we did give those youngsters more experience. In addition to solid foundational training it takes REAL miles actually going somewhere to make a good horse. Praise God from whom all blessings flow for my helper horse and adequate energy to pony a 4yr old and a 3yr old off of her simultaneously!!
Oakley's seventh ride ever - sixth ride under saddle. Oakley was confident enough to do his first cantering under saddle. After arena work we went on a trail ride. In addition to solid foundational training it takes REAL miles actually going somewhere to make a good horse.
Oakley's 8th ride ever - 7th ride under saddle. In addition to solid foundational training it takes REAL miles actually going somewhere to make a good horse.
Oakley's 9th ride ever - 8th ride under saddle. My youngest son and my daughter-in-law were riding with me. This provided the opportunity to introduce Oakley to passing and being passed in the arena. In addition to solid foundational training it takes REAL miles actually going somewhere to make a good horse.
Oakley's 10th ride ever - 9th ride under saddle. This was Oakley's first Waterloo trail ride under saddle. In addition to solid foundational training it takes REAL miles actually going somewhere to make a good horse.
Oakley's 11th ride ever - 10th ride under saddle. In addition to solid foundational training it takes REAL miles actually going somewhere to make a good horse.
Oakley's 12th ride ever - 11th ride under saddle. Far too wet - thus slippery - in our clay sod small lot we use as an arena. So my youngest son, my daughter-in-law, and I did a training road and trail ride - in our rain gear because it was misting out when we got started. In addition to solid foundational training it takes REAL miles actually going somewhere to make a good horse.
How to teach your horse to pick up its rider from a raised mounting platform
How to teach your horse to calmly accept the electric clippers while trimming its bridle path and pasture trimming its ears
How to teach your horse to stand perfectly calm while totally UNRESTRAINED for shoeing / trimming / etc.
How to teach your horse to Stand-Stay so it will be a better helper for you.
Start right! Safely mounting a totally green horse for the first time.
Defusing the anti-predator responses associated with mounting a horse.
One Horse-powered Snowplow
This Site's Index Page
Email me
Changes last made on: 21 May 2025
Accessed